Turning Pokemon Passport Service Into a Discord Bot
by William Spires
Selecting My First Discord Bot Project
Having finished the RealPython Discord bot tutorial, I was anxious to build a discord bot. I’d recently complete my Pokémon Passport Service Alexa skill, so I wondered how hard it would be to adapt that data to a discord bot. Millions of Pokémon fans use Discord, so I hoped my bot would help the greater community.
Creating the Credentials
To start, I opened the Real Python tutorial up in one window and the Discord Developer Portal in another. I created a new application called “Pokémon Passport Service” and gave it a Pokéball image as an icon. Then, I attached a bot to the application. I copied my token from the bot and pasted it into a .env file. I set the variable “DISCORD_TOKEN.” This variable can be recalled in my code to make sure the bot is authorized to run.
Setting up my Database
For this project, I already had a data source ready. I’d created a Pokémon Passport Service Alexa skill a few weeks earlier. I copied the ‘pokemon.json’ file from my Alexa project file and moved that copy into my discord bot folder. I quickly inspected the file for inaccuracies and then proceeded to the next step.
Getting the Dependencies
To build a discord bot with Python you need access to the discord.py Python library. I installed the library in the command line by typing “pip install -U discord.py.” With the library installed, I created a Python file called pokepassport.py. I imported the libraries I needed with these lines of code.
import os
import discord
import json
import requests
from dotenv import load_dotenv
from discord.ext.commands import bot
I needed JSON to read my JSON file, and requests to retrieve images of my Pokémon. I needed dotenv to read my environmental variable file. With these dependencies imported into my code, I knew I’d be able to build my bot.
Using Credentials to Connect my Python Code to Discord
To pull my token from the .env file, I typed the following two lines of code.
load_dotenv()
TOKEN = os.getenv('DISCORD_TOKEN')
Then, I typed the next three lines of code to make sure the bot will connect and run.
bot.run(TOKEN)
client = discord.Client()
client.run(TOKEN)
With these pieces of code added, I was confident that my bot would be able to connect to Discord.
Creating the Pokémon Passport Command
For this bot, I only wanted one command. I wanted to be able to request a Pokémon and find out the last game the Pokémon was available. To start, I created a command prefix with the following line of code.
bot = commands.Bot(command_prefix='!')Then, I defined my command with the following line.
@bot.command(name='passport', help='Tells you the last game a pokemon is obtainable in and playable in')To build the functionality of the command, I looked at the code I used for my Pokémon Passport Service Alexa skill. In my Alexa skill, I looked for Pokémon by their name. From there, I was able to pull out their Pokédex number, last game catchable in, and the last game they were playable. After considering how I designed the Alexa skill, I was ready to code the command.
First, I created the command function with the following line of code.
async def pokemon(ctx, pokemon_name):The bot would react to the command “!passport” and would take in a single argument “pokemon_name.” Next, I opened the JSON file as a Python dictionary with the following lines.
with open('pokemon.json') as f:
    data = json.load(f)
With the data loaded, I was able to pull up the Pokédex number and the games the Pokémon was last catchable and playable in with these three lines.
DexNumber = data[pokemon_name]['Pokedex Number']
LastCatchable = data[pokemon_name]['Last Game Catchable In']
LastPlayable = data[pokemon_name]['Last Game Playable in']
Now that I knew how to pull the data, I had a new issue. How would I address the issue of people using the command improperly? There is nothing forcing people to give a valid argument. I wanted the bot to inform users of their mistakes, so I decided to use an exception handler. If users used a valid Pokémon value, then they would get the standard response. If they used an invalid value, then they would receive an error message. The code below executed that vision.
try:
   DexNumber = data[pokemon_name]['Pokedex Number']
   LastCatchable = data[pokemon_name]['Last Game Catchable In']
   LastPlayable = data[pokemon_name]['Last Game Playable in']
except:
    response = "You didn't enter a valid pokemon name"
await ctx.send(response)
For one last bit of polish, I wanted to add an image of the Pokémon in question to the discord bot’s response. I used this website for my pictures. I created a variable called URL in this line.
url='https://pokeres.bastionbot.org/images/pokemon/{}.png'.format(DexNumber)Then I embedded the image and set the bot to respond with the picture. Finally, I had the block of code below.
@bot.command(name='passport', help='Tells you the last game a pokemon is obtainable in and playable in')
async def pokemon(ctx, pokemon_name):
    with open('pokemon.json') as f:
        data = json.load(f)
    try:
        DexNumber = data[pokemon_name]['Pokedex Number']
        LastCatchable = data[pokemon_name]['Last Game Catchable In']
        LastPlayable = data[pokemon_name]['Last Game Playable in']
        url='https://pokeres.bastionbot.org/images/pokemon/{}.png'.format(DexNumber)
        e = discord.Embed()
        response = "{} was last catchable in {} and last useable in {}".format(pokemon_name,LastCatchable,LastPlayable)
    except:
        response = "You didn't enter a valid pokemon name"
    await ctx.send(response)
    e.set_image(url=url)
    await ctx.send(url)
When I tested this command in my test server, I ended up with the response below.
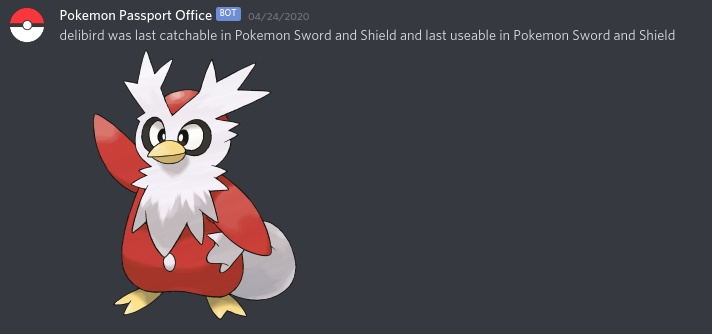
I was happy with these results, so I left the bot on for my friends to enjoy. If you’d like to check out the code, visit the GitHub Repository here.
Subscribe via RSS